Preparing to Install and Configure Oracle HTTP Server
You must decide whether to install Oracle HTTP Server collocated with an existing WebLogic Server domain or in a standalone domain.
Before beginning the Oracle HTTP Server installation, you must install and configure Oracle Fusion Middleware Infrastructure
Please see the link to install Weblogic 12.2.1.3 Oracle Fusion Middleware Infrastructure Installation
Weblogic 12.2.1.3 Oracle Fusion Middleware Infrastructure Installation
Step 1 : Stop all Weblogic services to install Oracle HTTP
Server collocated with an existing WebLogic Server domain
If your Node Manager, Administration Server, Managed
Servers, or any other servers are up and running, then you must shut them down
before you can begin installing and configuring Oracle HTTP Server in a
WebLogic Server domain.
Step 2 : Verify software requirements
Step 3 : Take a backup of existing installation as a precautionary step
Step 4 : Start the installation
cd to location when ohs binaries are kept
./fmw_12.2.1.3.0_ohs_linux64.bin

Select to skip automatic updates

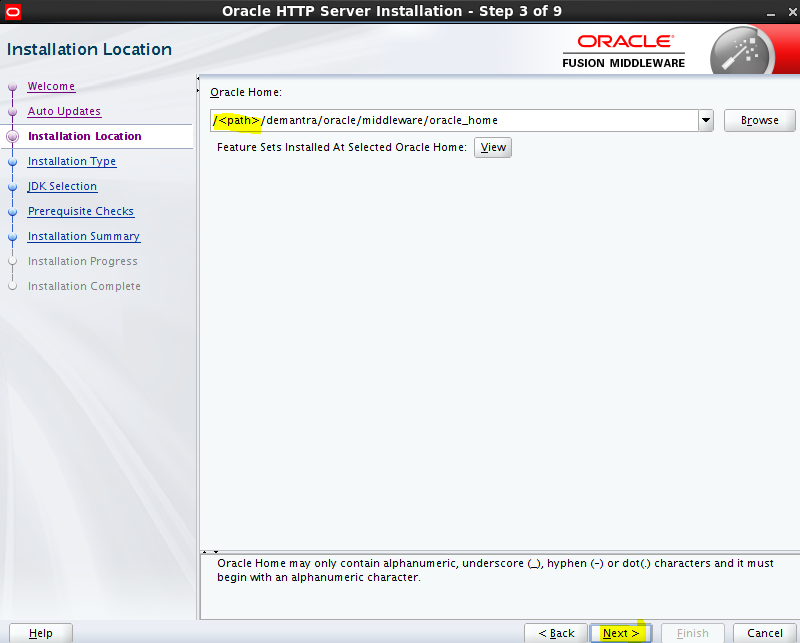
Specify your Oracle home directory location. You can click View to verify and ensure that you are installing Oracle HTTP Server in the correct Oracle home
Select Collocated HTTP Server (Managed through WebLogic
server).

Use this screen to select the JDK to use for this installation

To view the list of tasks that gets verified, select View
Successful Tasks. To view log details, select View Log. If any prerequisite
check fails, then an error message appears at the bottom of the screen. Fix the
error and click Rerun to try again.

Use this screen to verify installation options you selected.
If you want to save these options to a response file, click Save Response File
and enter the response file location and name. The response file collects and
stores all the information that you have entered, and enables you to perform a
silent installation (from the command line) at a later time. Click Install to
begin the installation.

This screen shows the installation progress. When the progress bar reaches 100% complete, click Finish to dismiss the installer, or click Next to see a summary

This screen displays the Installation Location and the Feature Sets that are installed. Review this information and click Finish to close the installer

Configuring Oracle HTTP
Server in a WebLogic Server Domain
To start the Configuration Wizard:
1. Change to the following directory: (UNIX) $ORACLE_HOME/oracle_common/common/bin
where ORACLE_HOME is your 12c (12.2.1.3.0) Oracle home.
2. Enter the following command: (UNIX) ./config.sh
Use the Configuration Wizard to extend an existing Infrastructure domain with an Oracle HTTP Server instance.
To specify the Domain type and Domain home directory:
On the Configuration Type screen, select Update an existing domain.
In the Domain Location field, select the Domain home location specified while configuring the Infrastructure domain.

Select the Configuration Template for Oracle HTTP Server

Choose the correct path

Check mark on the box next to data source and click next

This will do a JDBC datasource test

Provide Hostname, port, service name ,Schema Name (make sure you give right prefix) and Password

Use the Database Configuration type screen to specify details about the database and database schema. On the Database Configuration type screen, all fields are pre-populated, because you already configured the domain to reference the Fusion Middleware schemas that are required for the Infrastructure domain. Verify and ensure that credentials in all the fields are the same that you have provided while configuring Oracle Fusion Middleware Infrastructure. Verify the database connection information,
then select Get RCU
Configuration.
The following output in the Connection Result Log indicates
that the operation succeeded:
Connecting to the database server...OK
Retrieving schema data from database server...OK
Binding local schema components with retrieved data...OK
Successfully Done.


A green check mark in the Status column indicates a
successful test. If you encounter any issues, see the error message in the
Connection Result Log section of the screen, fix the problem, then try to test
the connection again. By default, the schema password for each schema component
is the password you specified while creating your schemas. If you want
different passwords for different schema components, manually edit them in the
previous screen (JDBC Component Schema) by entering the password you want in
the Schema Password column, against each row. After specifying the passwords,
select the check box corresponding to the schemas that you changed the password
in and test the connection again.

Use the Advanced Configuration screen to complete the domain configuration. On the Advanced Configuration screen, select:
• System
Components

In the system components screen click on Add
provide system component name as ohs1
Click Next

Provide hostname (FQDN), port , OHS listen port and click Next

Click on Unix Machine and then cross verify the details and click Next

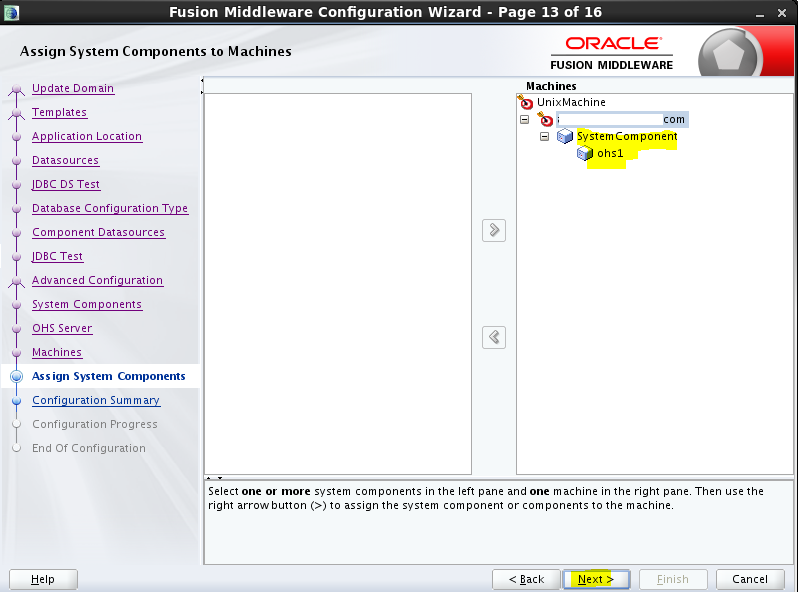
Move the System components towards right under hostname and click Next
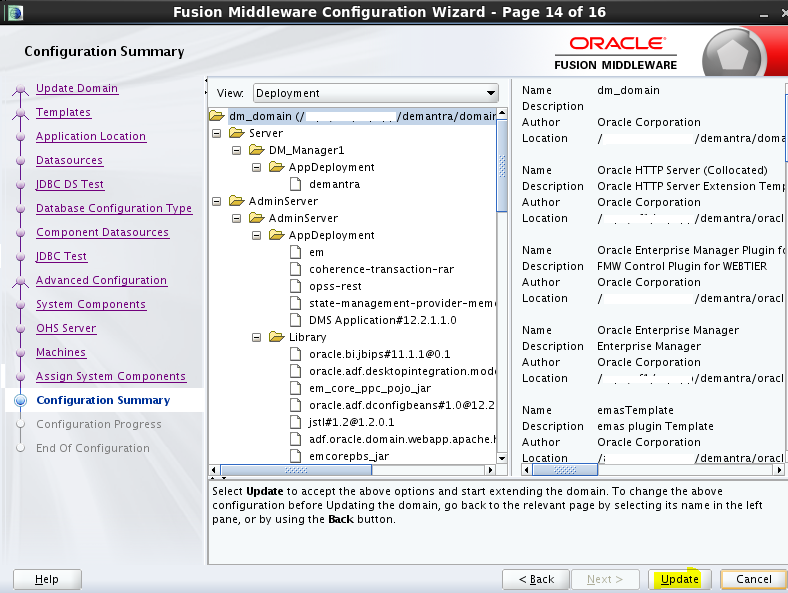
Check all the details and click on Update

Make a note of URLs and click on Finish

No comments:
Post a Comment